

STM32 Baremetal From Scratch — #1: Docker Setup
For this setup, I wanted a clean and reproducible STM32 baremetal development environment that didn’t depend too much on the host OS or a specific IDE.
At work, I had the option to choose my OS, so I went with Linux Mint. But a lot of my teammates were using Windows or different Linux distributions, and maintaining a consistent embedded toolchain across machines quickly becomes annoying.
This is just a small setup I’ll be using for random STM32 baremetal projects and experiments using a STM32F103RB Nucleo board along with completely open-source tooling:
GCC ARM Toolchain
OpenOCD
GDB
I’m not against IDEs or anything, I just wanted a minimal setup that gives full control over the build and debugging process without hiding too much behind generated code and GUI tooling.
Dockerfile
The Dockerfile itself is pretty minimal. I only included the packages required for building, flashing and debugging STM32 firmware.
FROM debian:bookworm-slim

ENV DEBIAN_FRONTEND=noninteractive

RUN apt-get update && apt-get install -y --no-install-recommends \
    ca-certificates \
    wget \
    xz-utils \
    make \
    openocd \
    gdb-multiarch \
    libusb-1.0-0 \
    && rm -rf /var/lib/apt/lists/*

# ARM GNU Toolchain
RUN wget -q https://developer.arm.com/-/media/Files/downloads/gnu/14.2.rel1/binrel/arm-gnu-toolchain-14.2.rel1-x86_64-arm-none-eabi.tar.xz && \
    tar -xf arm-gnu-toolchain-14.2.rel1-x86_64-arm-none-eabi.tar.xz -C /opt && \
    rm arm-gnu-toolchain-14.2.rel1-x86_64-arm-none-eabi.tar.xz

ENV PATH="/opt/arm-gnu-toolchain-14.2.rel1-x86_64-arm-none-eabi/bin:${PATH}"

WORKDIR /workspace

CMD ["bash"]
A few quick notes:
openocdis used for flashing and debugging over SWDgdb-multiarchallows GDB debugging for ARM targetslibusb-1.0-0is required for OpenOCD to communicate with the onboard ST-Link debuggerthe ARM toolchain is downloaded directly from Arm instead of using distro packages
I also wanted the container to stay fairly small and avoid unnecessary tooling for now.
devcontainer.json
Since I primarily use VSCode, I also added a minimal dev container configuration.
{
    "name": "stm32-baremetal-dev",

    "build": {
        "dockerfile": "Dockerfile"
    },

    "runArgs": [
        "--privileged"
    ],

    "mounts": [
        "source=/dev/bus/usb,target=/dev/bus/usb,type=bind"
    ],

    "remoteUser": "root"
}
The important part here is USB passthrough.
OpenOCD needs direct access to the ST-Link debugger on the board, so the container needs access to the USB device tree.
"--privileged"
gives the container access to hardware devices, while:
"source=/dev/bus/usb,target=/dev/bus/usb,type=bind"
allows OpenOCD to communicate with the ST-Link interface.
Without this, the debugger won't be visible inside the container.
Building the Docker Image
Once both files are ready, build the image from the project directory:
docker build -t stm32-baremetal-dev .
Running the Container from the Command Line
The container can be started manually using:
docker run -it --rm \
    --privileged \
    -v /dev:/dev \
    -v $(pwd):/workspace \
    -w /workspace \
    stm32-baremetal-dev
This mounts the current project directory into the container while also exposing USB devices required for OpenOCD and ST-Link access.
Running the Container Using VSCode
I also wanted the workflow to integrate nicely with VSCode without depending too much on extensions or IDE-specific tooling.
Once the devcontainer.json file is present:
open the project folder in VSCode
install the Dev Containers extension
press
Ctrl + Shift + Pselect:
Dev Containers: Reopen in Container
VSCode will automatically build the Docker image and reopen the workspace inside the container.
Verifying the Toolchain
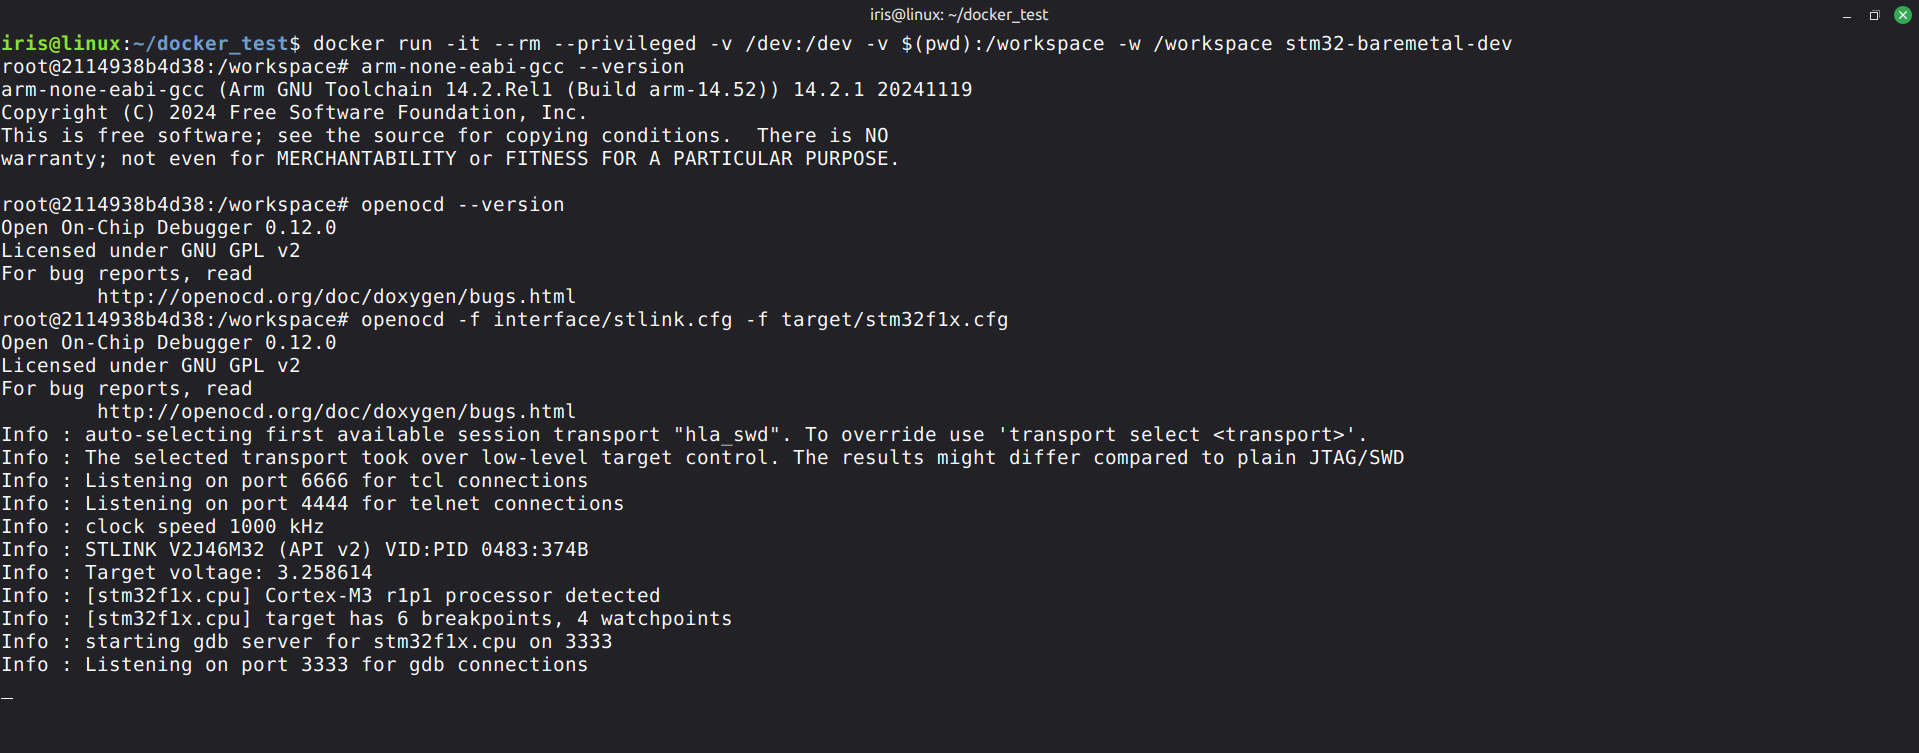
Once inside the container, the first thing I checked was whether the ARM toolchain was properly installed.
arm-none-eabi-gcc --version
This should print the installed GCC ARM version.
Similarly, OpenOCD can be verified using:
openocd --version
Verifying OpenOCD and ST-Link Access
Once the board is connected:
openocd -f interface/stlink.cfg -f target/stm32f1x.cfg
If everything is configured properly, OpenOCD should detect both the ST-Link debugger and the target MCU:
Info : STLINK V2J46M32 (API v2) VID:PID 0483:374B
Info : Target voltage: 3.25V
Info : [stm32f1x.cpu] Cortex-M3 r1p1 processor detected
Info : [stm32f1x.cpu] target has 6 breakpoints, 4 watchpoints
Info : starting gdb server for stm32f1x.cpu on 3333
Getting USB passthrough working inside Docker took a little more debugging than I initially expected, but once everything was configured properly the setup turned out to be pretty clean.
At this point the environment is fully capable of:
building firmware
flashing the target
running OpenOCD
GDB debugging
All inside a reproducible containerized setup.
At this point, the setup finally feels usable enough for actual embedded work.